Non-Intrusive Coupling Inspection
Coupling Inspections Are Time-Consuming, Disruptive — and Often Unnecessary.
Traditional coupling inspections can be tedious, inconsistent, and require machine stoppage — even when no issue is present. All that time and effort, just to confirm things are fine.
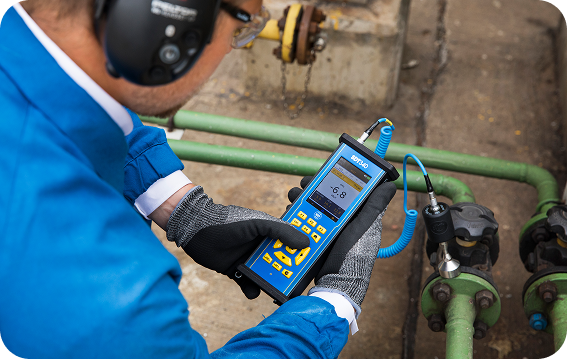
Ultrasound gives you a fast, accurate way to inspect couplings while they’re running. It’s easy to learn, safe to perform, and provides actionable insights in real time.


Why Coupling Inspection Matters
Mechanical couplings are critical connection points between rotating machines — and they fail more often than they should. Common failure modes include misalignment, under- or over-lubrication, looseness, and accelerated wear. That’s where airborne ultrasound excels. It allows you to inspect couplings in real time, without interrupting operations, and detect telltale sounds of looseness, friction, or imbalance long before damage occurs.
Here’s how valve failures impact your plant:

Hidden Defects
Internal issues often go undetected during visual inspections.

Costly Downtime
Many inspection methods require equipment to be shut down.

No Trending
Traditional inspections rely on guesswork—not accurate, trendable ultrasound data.
Common Valve Types (and Their Failure Modes)
Flexible and easy to install; common in pumps and gearboxes.
High torque capacity; used in demanding industrial applications.
Absorb shock loads; require regular lubrication.
Offer high precision and low maintenance; common in turbine systems.
Chosen for their flexibility and ability to absorb shock, vibration, and misalignment.


Ultrasound is a fast, simple, and reliable way to inspect couplings while in operation
With airborne sensors, inspections take seconds and can be performed safely while the equipment is running. SDT’s tools make it easy to scan, trend, and analyze friction and impacting signatures to catch early-stage coupling faults — without downtime.
A standard inspection involves scanning across the coupling housing to detect signs of looseness, resonance, imbalance, or metal-on-metal contact. With SDT software, collected data can be trended over time to support data-driven maintenance decisions.
Our Solutions for Coupling Inspections
Our route-based data collection solutions combine airborne and contact ultrasound sensors with precision vibration analysis into versatile, multi-purpose reliability data collectors. Fully integrated with the world's most powerful predictive maintenance software, these intuitive tools streamline asset inspections, simplify workflows, and deliver superior reliability outcomes.
Learn MoreOur ultrasound and vibration permanent monitoring solutions offer industry-leading sensitivity for the earliest possible fault detection. Engineered for durability and ease-of-use, these solutions provide remote, automated diagnostics—reducing maintenance costs and delivering a comprehensive, facility-wide view of asset health.
Learn MoreImaging technologies enhance visibility into hidden problems—revealing heat, sound, and motion that the eye can’t see. From thermal and acoustic imaging to motion amplification, reliability teams can use these vision enhancing technologies to detect failures. Our imaging solutions are a powerful way to see more, understand faster, and act with confidence.
Learn MoreUltrasound-guided lubrication empowers maintenance teams to grease bearings with precision by monitoring friction in real time during greasing tasks. By comparing live decibel readings to historical baseline data, technicians can identify when lubrication is truly needed, and when enough has been applied; preventing both under- and over-lubrication.
Learn MoreHow to Inspect a Coupling
01
Scan While Running
Use a flexible wand sensor to scan the coupling housing and through the guards. Point the sensor as close as safely possible.
02
Listen for Irregularities
Let the machine rotate normally. Listen for clicking, grinding, or resonance, indicating looseness, misalignment, or wear.
03
Capture Unusual Sounds
If you hear abnormal sounds, take a recording. Capture a few full rotations and store the data for further review.
04
Be Consistent
Sensor placement matters. Use consistent positioning and angles across inspections to ensure accurate, trendable data over time.

Get Started in Three Simple Steps
Coupling Inspection Frequently Asked Questions
Frame it in terms of risk avoidance and asset protection. A single unexpected coupling failure can cause hours of downtime and thousands in repairs. Ultrasound inspections reduce that risk with minimal cost, require no shutdown, and produce quantifiable data to support proactive maintenance. We also offer documentation tools and report templates to help justify program ROI.
Preventing even one unexpected failure from misalignment or looseness can pay for an ultrasound program many times over. You’ll reduce unplanned downtime, extend asset life, and optimize maintenance schedules.
Not at all. SDT’s tools are intuitive, and most techs can be trained to detect coupling issues in under a day — especially using ULTRAChecker for quick checks.
No. Ultrasound allows you to scan couplings while they’re running, through guards, using a flexible wand sensor for safe and easy access.
Yes. With the SDT340 and SDT software, you can capture, log, and analyze data across routes — building trends that support predictive maintenance decisions.
While SDT doesn’t offer direct CMMS integration, our analysis software lets you organize, trend, and report all inspection data in one place, supporting documentation and reliability planning.
Airborne ultrasound is ideal for quick, safe detection. It’s easy to use in noisy environments and doesn’t require contact — making it great for screening multiple couplings quickly. For more accurate diagnosis and long-term trending, a flexible wand sensor provides better data — especially through guards.
UAS3 is SDT’s ultrasound analysis software. It enables advanced diagnostics, custom inspection routes, high-resolution signal capture, and long-term data trending. You can log, compare, and analyze readings over time to support condition-based maintenance.
Absolutely. SDT ultrasound solutions are used for:
- Bearing condition and lubrication
- Steam trap testing
- Leak detection
- Valve analysis
- Electrical inspection From airborne to contact sensors, ultrasound provides versatility across your reliability program.
Airborne ultrasound works well for quick detection and screening. For detailed diagnostics, especially for trending and comparison, a flexible contact sensor (like a wand) gives more reliable results — particularly through guards and housing.
